 |
| Restoration Hardware St. James Armoire $2395 |
When you live in a small space like me, you must go "up" when it comes to storage. I needed a large armoire and I wish I could afford a piece from Restoration Hardware. Recently much of their furniture features a beautiful driftwood-style patina--really light, aged and distressed wood. I'm really attracted to their pieces because the finishes feel bare, simple and rustic. Not fussy or glamorous, yet are still chic.
Pictured here is the St. James armoire from Restoration Hardware in an antiqued natural finish. My project was to try to achieve a similar finish with a slightly more grey undertone and to do this, I would have to attempt several techniques that I've never tried before, including, bleaching wood and color washing.
 |
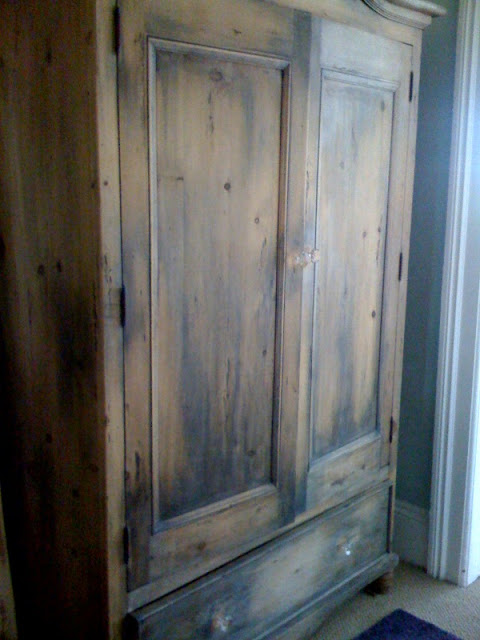
| Armoire before any treatment |
 |
| after bleaching |
 |
| Bleach burn-actually much worse than it looks here |
 |
| After color wash and wood wax |
There are other ways to bleach wood: (1)oxalic acid, (2) two part hydrogen peroxide and sodium peroxide applied separately, and (3) lemon juice. I decided to go with bleach because I already had it on hand. The next day I noticed I had accidentally left a sponge in the bleach bucket and it was completely disintegrated. Potent stuff! The next step was to apply a charcoal-grey wash. I diluted acrylic paint I already had from an art store (Daler Rowney acrylic DR120 $5.50), with water (about 20:1 ratio), and applied two coats (drying in between) using those same Trader Joe's sponges (they come in a big pack!). You can also apply color washes using two rags, one to apply, then the other to wipe off. I thought the sponges worked really well, the only obvious problem is that it is messy and I got it all over myself.
(The shots above were taken after the paint-wash) The color wash worked its way into the grain which I really liked. Although I was starting to get the color I was after, the finish looked really dull and dry. I sanded with 60 grit and then 150 grit paper, and rubbed on wood finishing wax paste (Minwax). At this point I thought I was done. The next morning, however, I thought it was too grey and the wax brought out a little redness in the wood. So using 60 grit sandpaper, I sanded and sanded and sanded. Essentially I was sanding out the wax which took a lot of muscle (I cannot wait to buy an electric sander). I went over that with 150 grit, and finally finished with several coats (1 spray can) of satin polyurethane. For the finishes that I like, lots of sanding seems to fix any problems. I finished the piece with "Hard Candy" clear glass knobs from Anthropologie ($2.95 each on sale). (finished armoire below)
Lastly, I reconfigured the shelving and hanging bar inside the unit to maximize space. I moved the hanging bar lower, and installed two upper shelves. For one of the shelves, I used scraps to add a divider and a smaller half-shelf above that. I did not create all the narrow shelving on the right! That was already in place. I had 3/4 inch pine cut at my local hardware store, and used an electric drill for the shelf holders. To keep the “T” of the divider in place, I drilled in both pieces and used an some extra wood pegs from an IKEA piece I was no longer using to secure them in place. Another project down the road will be to do something creative on the surface side doors and possibly the surface of the shelving as well. Extra benefit: now that my clothing is organized and everything has a place, I think twice about any purchases. If something comes in I know something else has to come out.
Overall this was a fun project and I completed it over the course of a couple weeks. Compared to the Restoration Hardware piece, I figure I saved myself close to $2300.


No comments:
Post a Comment